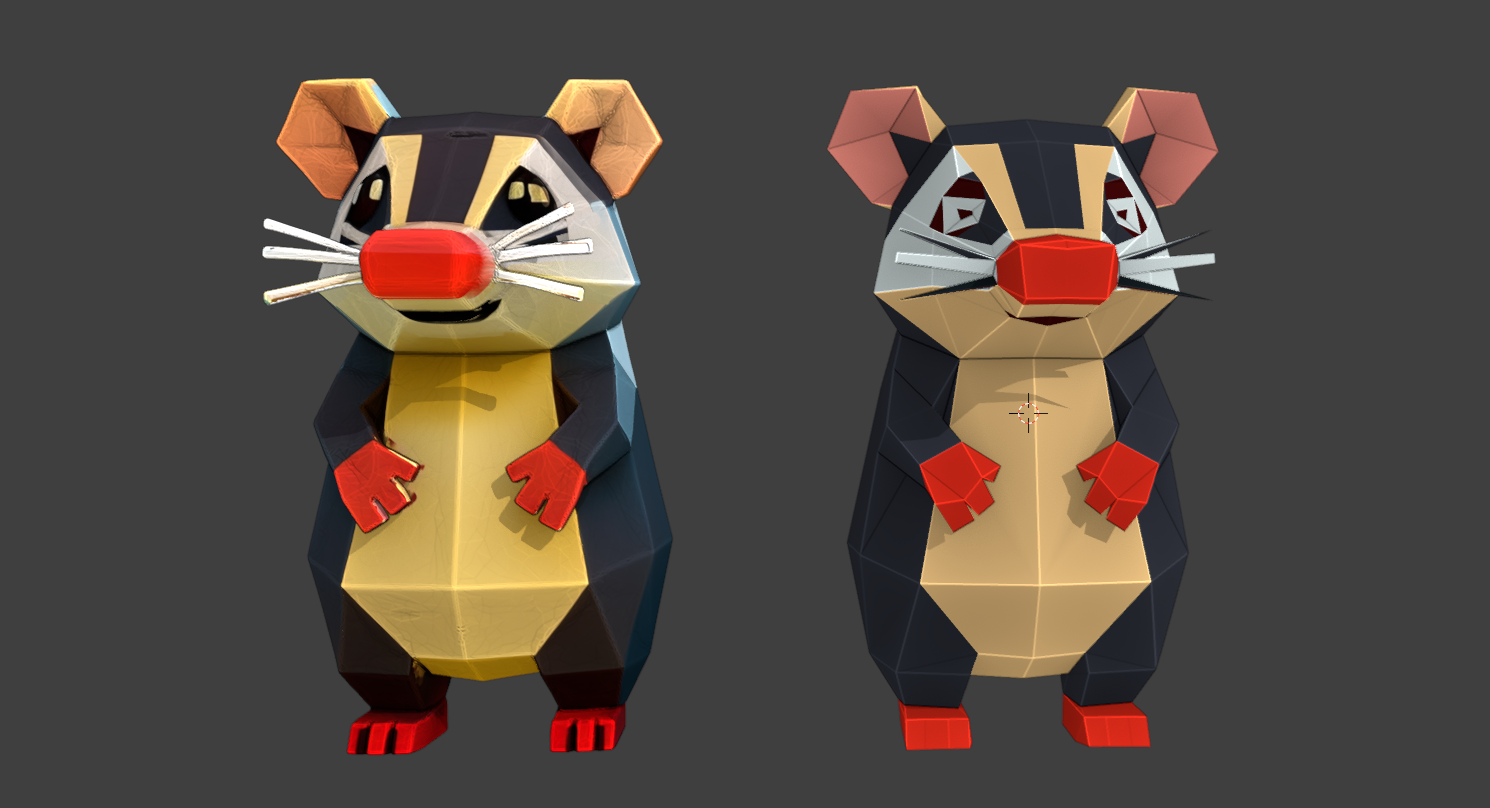
There are multiple Remeshing options in Blender which are great for many cases. But unfortunately when it comes to Lowpoly models, none of the remeshing options really result in what we expected to see.
Generated (fake low poly):
Remeshed (QuadriFlow):
Remeshed (Quad Remesher):
So how do we deal with this? Don’t worry, it’s easier than u thought, the answer is to just decimate the faces.
If you want to remesh a highpoly model to a real, blocky/lowpoly styled mesh, all you need is the Decimate modifier.
But wait, remeshing your model before might still be a good idea to create a better high poly model first, especially when your model has issues like missing faces.
Create Low Poly Model
- Make a copy of your High poly Model
- Merge Vertices
- Decimate (Symmetry X + Triangulate)
- Merge Vertices (just to be sure)
- (optional) Ctrl+T to triangulate (if not done yet with Decimate modifier)
Texturize Low Poly Model
- Make sure Topology fits your needs for texturing
- Create a Color Palette Texture from your Albedo Map
-
- with my AutoPaletteTexture-Addon for Blender
- Online
- Create a new Material (append it, don’t remove the old material yet)
- Add the Color Palette Texture to your Material as Albedo Map
- Assign faces step by step to new Material (make sure it’s selected) and to UV Unwrap for the newly assigned faces
- If needed, readjust vertices/edges by double clicking G and grab on a desired axis
🚀 Scaling and Snapping UVs to a Clustered Palette in Blender
Working with textures and UVs in Blender can be a tedious task, especially when you want consistent color mapping across complex meshes. Recently, I dove into creating a Blender addon that allows you to scale UV islands and snap faces to a clustered color palette. Here’s a summary of the process, the challenges, and the solutions we implemented.
🎯 The Goal
The main goal was to create a tool that:
- Scales individual UV islands for better layout control.
- Samples colors from textures and clusters them into a limited palette.
- Snaps each face’s UVs to the palette colors, making texture maps uniform and easier to work with.
This is particularly useful in stylized texturing workflows, game-ready assets, or when creating modular assets with consistent color blocks.
🔍 Challenges & Learning Points
1. Sampling Colors Efficiently
Initially, the code tried to copy the entire original texture to sample colors. This caused memory issues and extremely slow performance on large images.
Solution:
- Create a temporary copy of the image.
- Scale it down to a maximum resolution (e.g., 512px) for faster color sampling.
- Sample colors from this smaller version while maintaining correct UV mapping.
This drastically reduced processing time without sacrificing much visual accuracy.
2. Handling Blender Image Pixels
Blender’s Image.pixels array has a fixed size, and directly assigning a list of a different length caused a ValueError.
Solution:
- Create a temporary image with the same size as the original.
- Copy pixels first, then scale it internally using
image.scale().
This approach safely resized the texture without errors.
3. UV Island Scaling
Scaling UV islands individually required identifying connected UV islands. This involved:
- Iterating over selected faces.
- Using a stack-based search to collect connected faces sharing UVs.
- Scaling the UVs relative to their center.
This ensures each island scales proportionally without affecting others.
4. K-Means Color Clustering
To reduce the texture’s colors to a limited palette, we implemented a simple k-means clustering algorithm:
- Initialize
kcluster centers from sampled colors. - Iterate several times to assign colors to clusters.
- Compute cluster averages to define final palette colors.
This gives users control over the number of colors and ensures a consistent color palette.
5. User Options for Performance vs Accuracy
During testing, we noticed that using a downscaled image sometimes produced slightly different results.
Solution: Add a checkbox in the UI:
- ✅ Use downscaled image → faster but approximate.
- ❌ Use full-resolution image → slower but exact.
Additionally, users can set a maximum resolution for downscaled images, allowing them to balance speed and accuracy.
🛠️ Blender Operator UI
The final addon exposes these controls in the UV editor:
UV Island Scale: [0.1]
Max Colors: [16]
Block Size: [8]
☑ Use Downscaled Image
    Downscale Max Size: [512]
- UV Island Scale: How much to scale each UV island.
- Max Colors: Number of colors in the clustered palette.
- Block Size: Size of each color block in the generated palette texture.
- Use Downscaled Image: Toggle between fast approximate sampling and full-res sampling.
- Downscale Max Size: Maximum resolution for downscaled texture sampling.
✅ Key Takeaways
- Always respect Blender’s fixed array sizes when modifying images.
- Temporary downscaled textures are a simple and effective performance hack.
- UV islands can be scaled independently by finding connected faces.
- K-means clustering is a practical method for reducing color complexity.
- User options for performance vs accuracy make the tool flexible and user-friendly.
The Voxel Remesh Modifier can still be useful, for example to quickly fix holes or other issues in your mesh.
You can then (optional: unsubdivide) and decimate the mesh afterwards.
This tool can also create pixel-art versions of an existing image:
- Add a Plane
- Add Texture to Plane Material
- Add Multiresolution Modifier
- Click “Simple” 5-6 times
- Apply the Modifier
- Go to Edit Mode and check if topology suits your needs
- If it’s too less yet: start over with step 3
- Run LowpolyUV

